Unboxing and Initial Setup
What Comes in the Box
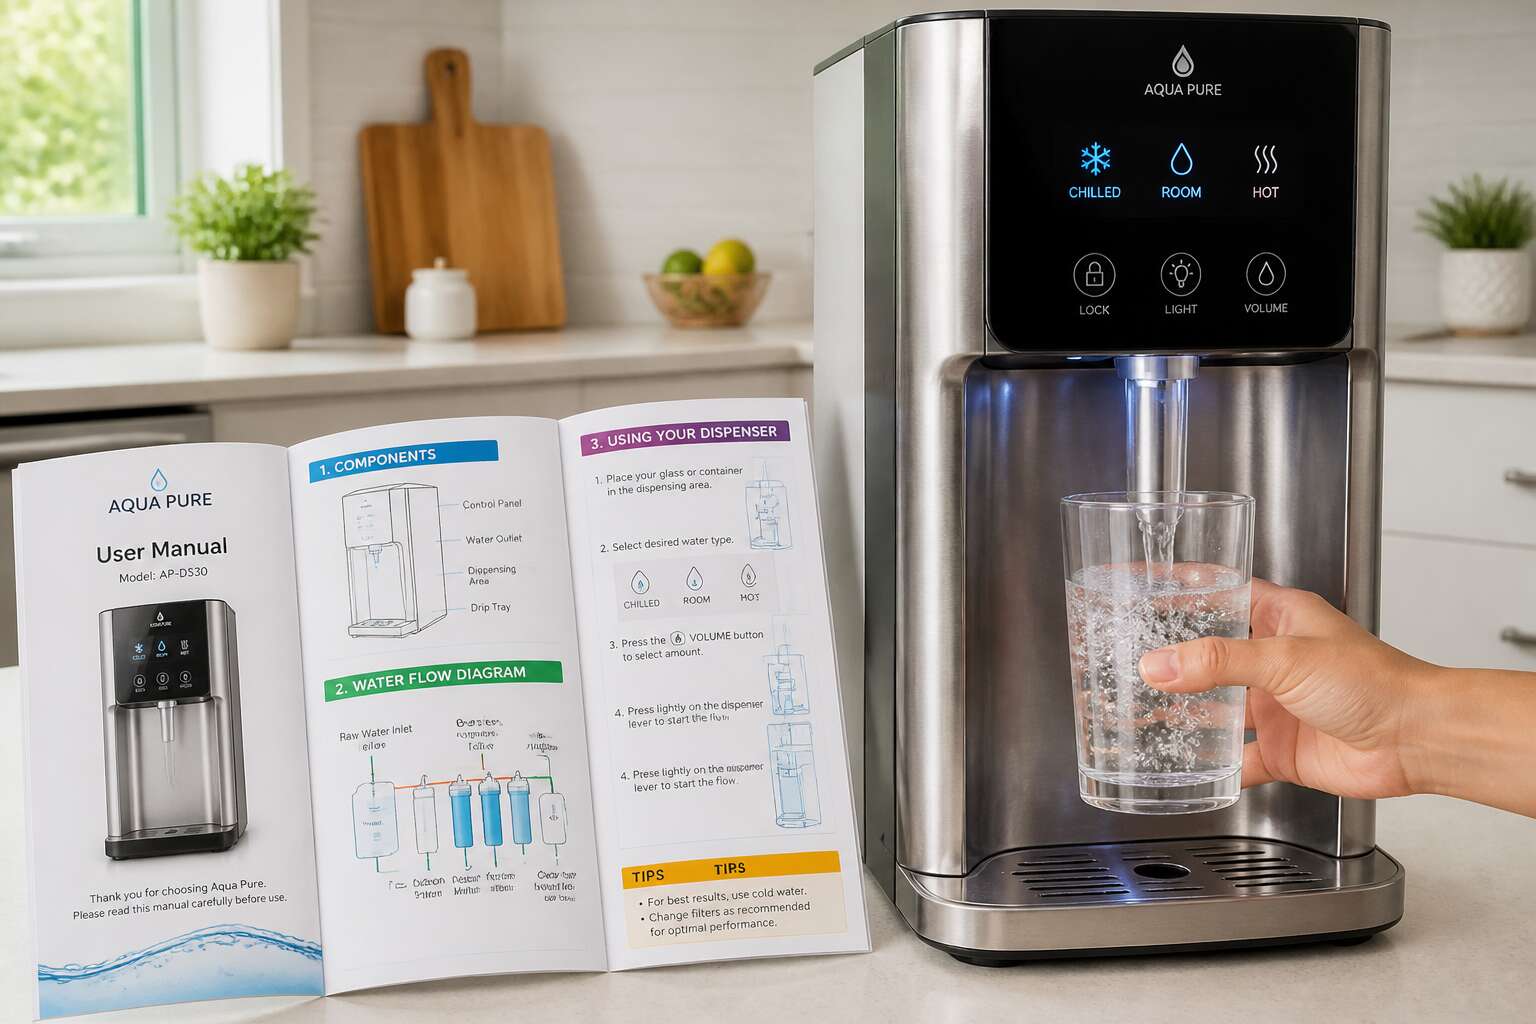
There is a quiet tension in peeling back the cardboard. A machine that promised convenience sits before you, reduced to parts and possibilities. The first act of ownership is verification, not celebration. Every packaged unit represents a contract between manufacturer and user, and the terms are printed in the water dispenser manual.
Unpack everything on a flat, clean surface. Compare each component against the manual before you plug anything into the wall. A standard box contains:
- the dispenser body
- a drip tray and grid
- a bottle probe with tubing
- a cold water tank or reservoir
- user documentation and warranty card
Inspect each part for transit damage, especially around the cooling system and connectors. The manual will list the procedure for reporting missing or damaged items. Resist the urge to rush. Your diligence here determines whether the machine hums quietly or fails three weeks later.
Choosing the Right Location
The room you choose shapes performance. Direct sunlight heats the cooling tank, forcing the compressor to work harder. The water dispenser manual often states a minimum gap of 10 cm behind the unit for airflow. Respect that distance.
Floor stability matters. A slightly uneven surface makes the internal float switch wobble, causing intermittent drips. On tiled floors, rubber feet grip better. On wood, a mat prevents scratches. I also keep a small torch near the unit for checking the drip tray.
- Keep the unit within 1.5 metres of a wall socket
- Away from stove heat and damp sinks
- In a spot you can access for bottle changes
Raising the dispenser off the floor, even slightly, reduces dust intake into the condenser coils. That simple choice extends the time between service calls.
Removing Packaging and Protective Films
The plastic film on a new dispenser hides more than scratches. Beneath it sits the condenser coil, packed with cardboard wedges for shipping. Pull them out first. The water dispenser manual will specify every piece of tape and spacer.
That film also covers the drip tray and the cold tap outlet. If you leave it on, the adhesive dries and cracks. Tiny shards end up in your first glass. I check the inside of the cooling tank while I am in there. Some factories leave a desiccant pouch behind.
Stick to a simple checklist:
– Remove all corner foam blocks
– Peel the film away from the back panel
– Check the power cord for kinks
The unit will groan and rattle on first startup. That is normal. If it rumbles after ten minutes, a transport screw is still lodged somewhere. The water dispenser manual shows exactly where these screws live. Trust that diagram.
Leveling the Unit
The most common reason a new dispenser rattles after a week is an uneven floor, not a mechanical fault. South African homes rarely have dead flat surfaces. In Johannesburg, screed slopes; in Durban, tiles sit on uneven concrete. The water dispenser manual shows the adjustable feet, but the actual process demands a spirit level.
Place the level on the top surface. Turn the feet clockwise to lower, counterclockwise to raise. If it wobbles, those rubber pads are not enough. Check the manual for the correct foot tension. A tilted dispenser also causes the internal tank to fill unevenly, leading to air bubbles in the cold line. That air creates sputtering taps.
Give the unit a minute to settle. The water dispenser manual often includes a diagram for this exact setup. A level unit cuts down on vibration noise and prevents premature wear on the compressor mounts.
Installation and Connections
Connecting to the Water Supply
Connecting the dispenser to your water supply is a quiet act of trust. The water dispenser manual outlines a simple process, but the details matter. Turn off the shutoff valve before touching anything. This one step prevents a soaked cabinet and a long afternoon.
– Identify the cold water line under the sink.
– Install the brass tee fitting onto that line.
– Run the 1/4 inch tubing to the dispenser inlet.
– Secure each nut hand tight, then a quarter turn with a wrench.
Open the valve slowly and inspect every connection. Small beads of water indicate a poor seal. If you rely on bottled water, the process becomes simpler. The water dispenser manual reminds you that most leaks occur from loose fittings, not faulty parts. A patient approach here makes the difference between a lasting appliance and a recurring headache.
Plugging In and Powering Up
During load shedding, the sequence of powering up matters more than most owners realise. The water dispenser manual mumbles a warning about voltage fluctuations. It does not tell you that a surge protector is worth the small investment. When power returns, the compressor groans if it restarts before the refrigerant pressure equalises.
Plug the unit into a wall socket on its own circuit. I know it is tempting to share the outlet with the kettle, but the compressor needs the full draw. Once connected, power on the unit and wait. The display lights up, the internal fan spins, and a quiet gurgle announces the system is pressurising. Listen past that first minute. A steady hum means the compressor is settled. Clicks and ticks from the relay are ordinary. If the unit trips the breaker, the water dispenser manual usually points to an earthed heating element or a loose terminal behind the rear panel.
Checking for Leaks
You have connected everything. Now for the real test! Turn the water supply valve slowly and listen. A hiss that fades is normal. A persistent hiss means trouble. The water dispenser manual calls this step “checking for leaks,” but it does not say where to look first. Start with the compression fittings. Moisture means a loose nut or misaligned ferrule.
Check the inlet hose at the back panel. Drips often come from a missing rubber washer. The manual’s diagram shows the parts, but the washer can fall out. Inspect the drain tray. Condensation can mimic a leak.
- Wipe all joints dry.
- Place a paper towel under each connection.
- Wait ten minutes before inspecting.
A drip on the paper towel means a real leak. The water dispenser manual lists torque specs, but a quarter turn past hand-tight suffices. If the paper stays dry, you are clear.
Priming the Water Lines
Priming is the step most people skip. They open the tap, see water, and assume the dispenser is ready. Air stays in the line, causing sputters and low pressure for days. The water dispenser manual lists priming as a required step. Run the cold tap until the stream flows continuously. Thirty seconds usually works, though a long line can take two minutes.
Watch for these signs during priming:
- A pulsing stream that smooths into an even flow
- Air bubbles moving through the clear housing
- A brief surge of cloudy water before it clears
The water dispenser manual recommends checking the drain tray, since the first purge can release excess water. When the flow steadies, turn off the tap and repeat on the hot side. Expect a churning sound as steam pushes through. That is normal! The manual does not mention this noise, which leads to many false service calls.
Setting Up the Drip Tray
The drip tray is the part people notice last and regret ignoring first. It sits beneath the tap, collecting spills and condensation. A misplaced tray causes water to pool on the counter, which leads to limescale and bacterial growth. The water dispenser manual shows a simple alignment guide, but most users skip it.
The tray slides into a slotted base. Push it until it clicks. The click matters because some models use a pressure sensor. Without the click, the sensor may not register, and the manual’s maintenance reminders stay dormant. Check that the grid sits level and that the drain hole faces the back.
- The grid inside the tray to catch debris
- The reservoir that collects runoff
- The locating tabs that lock into the base
When the tray sits correctly, water flows into the reservoir instead of down the cabinet front. The water dispenser manual warns against forcing the tray. Forcing it bends the tabs, and a bent tab guarantees a loose fit. Remove the tray periodically to rinse away mineral deposits, then slide it back until it clicks again.
Operating the Dispenser Controls
Understanding the Control Panel Icons
Once the water lines are primed and the drip tray clicks into place, the console becomes your command post. The icons on the panel are a language of their own, and learning them takes minutes, not hours. Most dispensers feature a power symbol, a heating indicator, and a cooling light. Some models add a child lock icon, shown as a padlock, which must be held for three seconds to release.
You might also see:
- A droplet icon for cold water release
- A steam icon for hot water
- A blinking red light, which signals the tank is warming
Reading these signs correctly prevents accidents and wasted energy. I recommend memorising the padlock icon first. This water dispenser manual section guides you through each symbol so you can operate the unit with confidence.
Adjusting Water Temperature
Operating the dispenser controls is mostly a matter of patience. Once you set a temperature, the unit needs time to adjust, especially when you switch between hot and cold. The thermostat responds slowly, so do not expect an instant change.
Look for the temperature dial or the buttons on your model. A dial turns clockwise for hotter water and counter clockwise for cooler. Digital panels use arrow keys or plus and minus symbols. I prefer the dial, because it gives you a sense of how much you are altering.
- Hot water for tea or coffee: 90 to 95 degrees
- Warm water for baby formula: 70 degrees
- Cold water for drinking: 5 to 10 degrees
Your water dispenser manual will list the exact range for your unit, and it is worth reading that section twice. South African altitude also matters. At higher elevations, water boils below 100 degrees, so the heating element may be calibrated differently. Allow the tank to run a full cycle before you judge the temperature.
Using the Hot Water Safety Lock
The hot water safety lock is the quietest feature on your dispenser, yet it may be the most important. A single press of the lock button prevents the tap from releasing water above a safe temperature. In homes with small children, this small mechanism earns its place every single day. I have watched parents relax visibly once they understand how it works.
Your water dispenser manual will show a padlock icon near the hot water control. Hold the button for three seconds to disengage; the indicator light shifts colour. Some models re-engage the lock automatically after a few minutes of inactivity. This auto lock feature means you never have to remember to switch it back on.
The water dispenser manual for your model will list the exact control variations:
– Press and hold the lock button for three seconds
– Slide a physical latch toward the front of the unit
– Tap the lock icon on a digital control panel
The safety lock never restricts cold water. That side of the dispenser remains freely available.
Dispensing Room Temperature vs. Chilled Water
Here is where the manual earns its keep. The room temperature and chilled water taps look identical, but they behave differently depending on the season. In Johannesburg’s summer, room temperature means tepid. In Cape Town’s winter, it means brisk. The chilled water stays constant, which is why most South Africans default to it.
Operating the dispenser controls is straightforward once you understand the flow. Most models use a two lever system. Push the left lever for ambient water, the right for cold. Some digital panels require a touch and hold action. A water dispenser manual will specify which side does what. The room temperature water runs directly from the reservoir, while chilled water passes through the cooling coil. Most models follow a simple pattern:
- Left lever: room temperature
- Right lever: chilled
- Centre button: cold water boost, if fitted
The flow rate differs too. Chilled water exits slower, as the cooling system regulates the stream. Check your water dispenser manual for the exact layout, because the levers are not always labelled clearly.
Child Lock Features and Activation
Once the levers are mastered, the child lock becomes the next gatekeeper. Many South African families install dispensers in open-plan kitchens, where curious hands reach for the cold tap. The child lock prevents accidental dispensing, especially on models with a hot water option. Activation usually requires holding a dedicated button for three seconds. Some manuals call it the safety key, others label it with a padlock icon.
The water dispenser manual will clarify the exact sequence. For most units:
- Press and hold the child lock button until the indicator light turns red.
- Release and wait for the beep.
- Test the lever to confirm it is locked.
Deactivation follows the same steps. A red light means engaged. No light means open. Some models auto-lock after thirty seconds of inactivity. Check the water dispenser manual for that feature. Without the manual, you might miss that setting.
Night Mode or Power Saving Options
Night mode is the feature South African households never knew they needed until the first bill arrived. It dims the display and reduces compressor activity during off-peak hours. Some units call it power saving, others label it eco mode. The water dispenser manual will tell you which name your unit uses.
Press the moon icon to activate it. The display dims, the beeper softens, and the unit stops reheating water until morning! A few models let you set the start and end times. The water dispenser manual includes the default schedule, often 10 p.m. to 6 a.m.
Night mode changes a few behaviours:
- Hot water takes longer to reach temperature after a night of power saving.
- The chilled tank still maintains a base temperature, so cold water remains usable.
The wiring diagram in the manual shows which components power down, so you know exactly what is resting.
Maintenance and Cleaning Procedures
Daily Wipe-Down Routine
The daily wipe-down is a quiet ritual, a small act of vigilance against the slow creep of grime. Every evening, after the last cup is poured, I take a soft cloth and trace the exterior surfaces, paying attention to the seams where dust gathers. The drip tray, that silent collector of spills, deserves particular attention. Lift it free, empty the standing water, and rinse it under the tap. A solution of mild soap and warm water works best; harsh chemicals will dull the finish and leave their own residue behind.
Check the spout area, where mineral deposits begin their patient work. A damp cloth catches what the eye misses, and I find that a quick pass here prevents stubborn buildup. Your water dispenser manual will specify compatible cleaning agents, so consult it before using anything stronger than soap. This small effort preserves the machine’s performance and keeps the water tasting pure. A minute of care now saves an hour of scrubbing later!
Weekly Deep Cleaning of Nozzles and Drip Tray
A nozzle that drips unevenly is often a sign of biofilm, not mechanical failure. Weekly deep cleaning prevents this. I remove the nozzles carefully, following the disassembly sequence in your water dispenser manual. Soaking them in a warm vinegar solution dissolves mineral scale, though the manual may recommend a different agent for rubber components.
The drip tray demands the same attention. I lift it out, dislodging stubborn residue with a soft nylon brush. Then I wash the grid and basin in soapy water, rinsing thoroughly.
- Clean nozzles weekly to prevent blockages.
- Soak the drip tray components to remove hidden bacteria.
- Dry all parts fully before reassembly.
Reinserting parts while damp invites mould. A dry assembly keeps the water path clean. The torque specifications in the water dispenser manual matter too, overtightening cracks the plastic threads.
Descaling the Internal Components
The first clue that your dispenser needs descaling often arrives as a sluggish trickle or a faint, chalky aftertaste. Hard water deposits accumulate quietly inside the reservoir and heating tank, forcing the unit to work harder for every cup. I check my water dispenser manual for the recommended descaling interval, which generally falls between every three and six months depending on local water hardness.
- Slow water flow from the tap
- Unusual rumbling sounds from the heating element
- A mineral film floating on the surface of hot drinks
When I descale, I use the citric acid solution my water dispenser manual specifies, never vinegar for the internal tank since it can degrade rubber seals. The solution sits for the exact duration stated, then I flush the system with fresh water repeatedly. The purge cycle outlined in my water dispenser manual clears every trace of the descaler before I consider the job complete.
Replacing Water Filters
Filter replacement is the quiet ritual most owners overlook. I set a reminder after reading my water dispenser manual, which advises swapping the filter every six months or after roughly 1,500 litres. The manual notes that sediment and chlorine taste return gradually, so the change often goes unnoticed until the water turns dull.
The replacement takes a few minutes. Turn off the unit, release pressure from the tap, then twist the old cartridge a quarter turn. Pull it free and insert the new filter, aligning the arrows before locking it back into place. My water dispenser manual warns against rinsing the cartridge itself, since the carbon needs dry handling.
- Check the filter housing for debris before insertion
- Run two full tanks through the system afterwards
- Note the installation date on the cartridge
Flushing clears the air pockets and fine carbon dust. Only then does the dispenser pour clear and bright again. The manual also reminds me that skipping this step voids the warranty, so I treat it as part of the routine rather than an interruption.
Sanitizing the Reservoir
The reservoir holds water longer than any other component, which makes it the primary suspect when tastes turn strange. My water dispenser manual prescribes a monthly sanitising cycle that takes about fifteen minutes. Unplug the unit first, then drain the tank completely through the taps. Mix a food-grade sanitiser at the exact concentration the water dispenser manual specifies, since too strong a solution damages seals and too weak a one leaves biofilm behind.
Let the solution rest against the interior walls for ten minutes. Swirl it a few times to reach the corners, then drain and rinse with two full tanks of clean water.
Signs the reservoir needs attention:
- A flat or metallic taste in the chilled water
- A slippery film on the interior surface
- Persistent cloudiness after filter replacement
Avoid soap entirely, as residue lingers in valves and hoses. The manual repeats this caution, and following it keeps the flush clean and the unit honest.
Troubleshooting Common Malfunctions
Dispenser Is Not Cooling or Heating
When the dispenser fails to cool or heat, the first suspect is often the power supply. Check that the unit is firmly plugged into a dedicated outlet. A tripped circuit breaker or a faulty socket can silently mimic a hardware failure.
Next, confirm the internal switches. Many models have a separate power toggle for the compressor or heating element. Consult your water dispenser manual to locate these controls. Also, inspect the rear ventilation grilles for dust buildup, which can trigger overheat protection.
- Listen for a faint hum when cooling is active.
- Wait 24 hours after installation for the system to stabilise.
If the water remains tepid, the thermostat may need recalibration. A trained technician can test the compressor relay or heating coil. Always switch off the appliance before any inspection.
Unusual Noises and Vibrations
A silent dispenser is a rare luxury. When yours starts thrumming, clanking, or vibrating, the cause is often simpler than you think. The compressor naturally produces a low hum, but a sharp rattle usually points to loose internal fittings or a resonance with the countertop.
Consult your water dispenser manual for the recommended clearance around the unit. Vibration often travels through the cabinet when the machine touches a wall. Check the drip tray and bottle guide for instability.
Common culprits include:
- Loose drip tray or grille
- Air trapped in the water lines
- An uneven floor surface
A persistent knocking may indicate a failing fan blade or a loose refrigerant line. Tighten external panels, but leave internal repairs to a technician. Isolate the sound to identify the source.
Water Leaking from the Unit
A puddle on the floor is a clear signal. Water leaking from the dispenser rarely announces itself with subtlety. That puddle is never just condensation! I have traced a single errant droplet traveling a bizarre path to trick you into thinking the reservoir is compromised.
Start with the drip tray. A full tray is the most obvious suspect, but a slow leak often originates from a loose fitting at the water line connection. Check these points before condemning the internals:
- The collection cup under the cold water tap.
- The threading on the bottle cap adapter.
- The silicone seal around the bottle probe.
Consult your water dispenser manual for the specific diagram of the internal tubing. Your water dispenser manual will also list the exact torque for the fittings. A cracked tank or a faulty float valve requires professional attention, but you can stop the spread with a dry cloth while you locate the source.
Bad Taste or Odor in Dispensed Water
That metallic tang or musty whiff from your tap is your unit telling you something! Most taste complaints trace back to stagnation or microbial growth, not the municipal supply.
I usually tell people to start with the obvious: if the dispenser has sat unused for days, flush a liter through each tap. If the odor persists, check the water filter status. A saturated filter becomes a breeding ground.
- Standing water in the reservoir
- Biofilm on the nozzle interior
- Contaminated bottle probe
Your water dispenser manual will specify the filter replacement interval and sanitization method. Follow that schedule. Ignoring it guarantees a return visit from the bad taste.
Display Error Codes and Alarms
When the display throws an error code, most people assume catastrophe. In my experience, nine out of ten alarms trace back to a sensor that simply lost its reference point. The E3 code on many South African units, for instance, signals a thermistor reading outside expected range, not a dead heating element.
Here is the sequence I follow when an alarm appears:
- Note the exact code and whether it blinks or stays steady.
- Reset the unit by unplugging for sixty seconds, then restore power.
- Check the water dispenser manual for the specific code table, as labels differ by brand.
If the alarm returns, suspect the float switch or a stalled fan. These components fail quietly, and their error messages look identical to other faults. The water dispenser manual’s troubleshooting matrix usually narrows it down faster than guesswork ever will.
Reduced Water Flow or Slow Dispensing
A dispenser that delivers a pathetic trickle is not being shy. A slow flow rate often comes down to three suspects: air trapped in the line, a filter that has given up, or a supply tube folded into an awkward position. I have also seen a float valve stick shut, which produces a similar symptom. Your water dispenser manual will have a flow rate diagram, so use it.
- Inspect the supply line for kinks.
- Run a litre to purge air pockets.
- Check the filter indicator, if fitted.
If none of that cures the lethargy, the internal pump may be cavitating. A pump that hums but does not push water is usually starved of supply. The water dispenser manual lists the pump pressure specs and the likely culprits; slow dispensing rarely requires a new machine.
Extended Care and Seasonal Storage
Preparing the Unit for Long-Term Storage
When the season turns and your dispenser falls silent, long term storage demands more than unplugging. I have seen units ruined by neglect that a few minutes could have prevented. The water dispenser manual often glosses over this, but your diligence matters.
Begin by draining every reservoir and line completely. Residual moisture breeds biofilm, which no amount of later cleaning will fully reverse. Wipe internal surfaces with a mild sanitizer, then dry them with a lint free cloth.
- Disconnect the water supply and relieve pressure
- Remove filters and store them sealed
- Leave doors ajar to prevent mold
Wrap the power cord loosely and shield the unit from dust. A covered, climate controlled space preserves seals and electronics. When you return, consult your water dispenser manual for restart steps.
Winterizing and Preventing Freeze Damage
Ice expands with a force that splits pipes and cracks reservoirs. In the Highveld or Karoo, an unheated garage or patio presents a severe risk. Your water dispenser manual covers general storage procedures, but winterizing requires a dedicated focus on every freeze point.
Before the first frost, wrap exposed tubing with foam insulation. Check the room’s thermostat. If the temperature dips below 4 degrees Celsius, consider relocating the unit entirely. Leave a slow drip on the cold tap to keep water moving if the unit must stay in place.
- Inspect inlet valves for hairline fractures.
- Cover external vents with breathable material.
- Clear condensation drains to prevent ice blockages.
I have seen units return in spring with cracked internal lines because owners assumed indoor conditions sufficed. A specific winterization routine, noted in your water dispenser manual, prevents this exact structural failure.
When to Call a Professional Technician
Seasonal storage tests a unit more harshly than daily use. A dispenser that performed flawlessly in January can fail by August after months in a storage room. The water dispenser manual lists basic care steps, yet some symptoms demand professional judgment:
- A persistent burning smell from the rear grille
- Compressor runs for hours without cycling off
- Internal leaks that reappear after complete drainage
These signs point to sealed-system damage. Certified technicians use nitrogen tanks and electronic leak detectors to find faults invisible from outside. I have watched novice repair attempts end with complete evaporator replacements. The water dispenser manual covers user-serviceable parts only. Refrigerant, high-voltage boards, and internal welds belong in licensed hands.
Ordering Replacement Parts and Accessories
Extended care begins where the checklist ends. Seasonal shifts in South Africa, from humid coastal summers to dry Highveld winters, stress plastic casings and rubber gaskets in different ways. A water dispenser manual shows an exploded view of every component, yet few owners learn to match those diagrams against real wear. After months in storage, inspect the condenser fins and door hinges before recommissioning. Hairline cracks announce themselves quietly.
Ordering replacement parts demands precision. Quote the model number and serial number exactly, because two visually identical dispensers may carry different valves. The water dispenser manual contains the parts list; treat it as a reference, not a suggestion.
Keep a small stock of consumables ready:
– Water inlet valve
– Drip tray grommets
– Thermostat probes
Accessories matter too. A pressure-reducing valve protects internal seals when municipal mains pressure runs high.




0 Comments