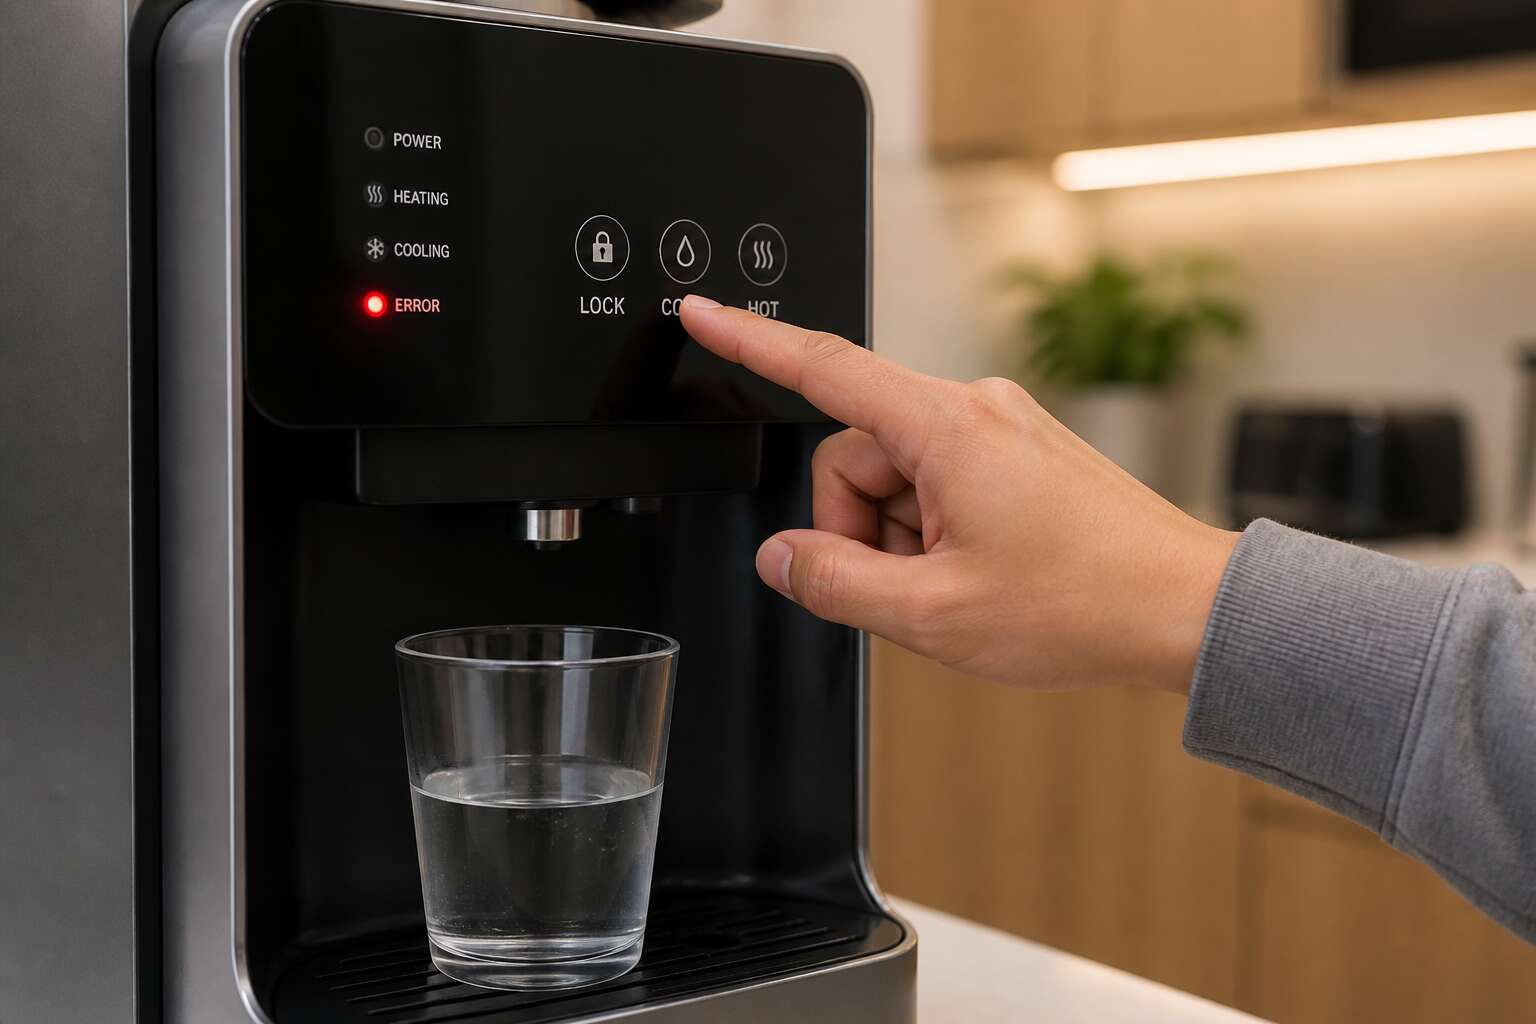
Identifying the Type of Failure
No Water Dispensed
When your water dispenser is not working, silence from the spout tells you more than any error code. I have watched my own machine refuse to yield a drop, and the frustration is real. A closer look reveals the reason quickly.
Start with the obvious. Is the unit powered? Load shedding can reset thermostats. But if the light glows and nothing comes, the issue lies deeper. Listen for a faint hum! No hum means the pump is stalled. A hum with no flow points to a blocked line.
- Check the water tank level.
- Feel the nozzle for ice, which signals a frozen pipe.
- Inspect the air vent; a vacuum lock stops all flow.
Each sign changes the repair path. A frozen pipe needs thawing, while a vacuum lock just needs release. Observe before you call for help.
Water Not Cold Enough
In the quiet South African summer, luke warm water from a supposed cooler is a small betrayal. Your water dispenser is not working as intended, and the temperature is the first casualty. The compressor is the heart of the cooling system, and when it fails, the ambient heat wins the battle. You place your hand on the side panel. Warmth radiating outward is a sign that the condenser coils are working overtime, or possibly not at all.
A choked airflow is often the culprit. Dust and pet hair suffocate the condenser, forcing the system to struggle. The cooling cycle relies on a delicate dance of refrigerant and pressure, and any obstruction breaks the rhythm. Also, consider the thermostat. A dial nudged accidentally, or a faulty sensor, can trick the unit into thinking it has done its job.
Check these specific points:
1. Verify the temperature control setting is not on the lowest cooling level.
2. Clean the condenser coils at the back or base of the unit.
3. Listen for a clicking sound when the compressor tries to start, which indicates a thermal overload.
The unit needs room to breathe. If it is boxed into a tight corner without ventilation, the internal temperature will never drop. This is a slow, systemic decline, not a sudden break. The water flows, but the promise of refreshment is gone. Repeatedly running the compressor in a hot room without proper airflow leads to premature failure. The internal ice bank may also need time to recharge, but if the environment is hostile, the cold will remain elusive.
Leaking Water From the Unit
A single puddle beneath the unit can feel like a small betrayal, especially on a pristine tile floor. When your water dispenser is not working due to a leak, the source often lies within the internal reservoir or the supply line connections. The reservoir can develop hairline fractures from repeated freezing cycles or physical stress. Check the drip tray first; overflow is a minor issue. A persistent pool of water, however, indicates a system breach.
Look beneath the machine for signs of mineral deposits. These chalky trails tell the story of where the water has traveled. Loose fittings at the water inlet valve are common culprits. The internal float valve, which regulates the water level, can also stick open, causing the reservoir to overfill. This overflow spills out the vents. Condensation is a separate matter, but it can mimic a genuine leak.
– Inspect the drain pan for cracks or rust.
– Feel the tubing connections for moisture and tightness.
– Examine the bottom seam of the water tank for dampness.
If the leak originates from the bottom but the tank appears dry, the issue is the internal water line routing. These lines can work loose from their grommets. The water then bypasses the dispensing mechanism entirely. Pay attention to the temperature of the water pooling. Cold water suggests a reservoir issue, while room temperature water points to the inlet line. Ignoring the leak risks damage to the flooring and internal electronics. This failure mode demands immediate attention before the water reaches the motor or the compressor. Do not leave the unit plugged in while investigating, as standing water poses a risk.
Unusual Noises During Operation
A grinding grumble from a water dispenser is not working is your first warning sign. Unlike leaks or temperature failures, noise exposes the internal struggle before visible damage appears. I have traced a persistent hum to a failing compressor, while a clicking sound suggests the inlet valve opening erratically.
Listen for three patterns. A high pitched whine during the cooling cycle suggests the fan blade is striking the housing. A gurgling sound indicates air trapped in the supply line. A rhythmic thumping often means themotor mount fatigued.
- Check whether the noise occurs only during dispensing orb during cooling
- Feel the unit’s sides for vibrations coinciding with the sound
- Compare the noise intensity against normal operational volume
Ignoring these acoustic clues leads to motor burnout orb compressor failure. A water dispenser is not working from a seized pump is far costlier than a simple repair. Act on the first unusual note, not the fifth.
Common Causes Behind Malfunctions
Power Supply and Electrical Issues
Electricity is unreliable, and when your water dispenser is not working, the problem often sits at the power source. In South Africa, loadshedding turns every appliance into a mystery. Your dispenser might appear dead after a brownout, yet the motor stores residual charge.
Common power supply failures include tripped breakers, loose connections, and worn cords. I have seen a dispenser refuse to start because its plug sat one millimeter astray. Test the outlet with a lamp, but do not trust the lamp. Lamps lie.
- A tripped earth leakage unit after a surge
- A damaged power cord hidden under the carpet
- An internal transformer that surrendered quietly
When a water dispenser is not working, each failure shows different symptoms. The display may glow while the heater stays cold. Sometimes nothing happens at all. The electrical path is simple, yet it breaks in many ways.
Faulty Thermostat or Temperature Sensor
Thermostats control the boundary between hot and cold. When a thermostat fails, the water dispenser is not working in a way that feels almost personal. The water stays lukewarm, or the unit runs endlessly, unable to reach the set temperature.
I have seen sensors drift out of calibration by a few degrees. That small error compounds. The heating element stays on too long, or not long enough. The result is a machine that behaves erratically, yet never fully stops.
- Intermittent hot water that cools too fast
- Continuous heating with a burning smell
- Cold water that turns tepid
Each symptom points to a different failure mode. A thermistor may read resistance incorrectly. A mechanical thermostat may stick. The control board may misread the signal. When the water dispenser is not working, the thermostat is often the cause.
Clogged Water Lines or Filters
When your water dispenser is not working, the culprit often hides inside the supply line or filter cartridge. Sediment, rust flakes, and mineral scale accumulate over time, particularly in areas with hard water. A partially blocked line reduces flow pressure, causing sputtering streams or slow fills. The filter itself may become saturated after months of service, restricting water movement even when the pump runs normally.
Common causes include:
- Calcium and lime deposits narrowing the tubing
- Sediment from municipal pipes or borehole systems
- Aged filter cartridges past their rated capacity
- Kinked or crushed plastic lines restricting flow
Checking the filter’s pressure gauge and inspecting visible tubing for bends will reveal most blockages. Replacing the cartridge at the manufacturer’s interval prevents most flow failures. If the dispenser still struggles, flush the system with clean water to dislodge loose debris from the lines.
Broken Water Pump or Valve
Nearly 30% of dispenser breakdowns trace back to a silent mechanical failure, not a power surge or a blocked tube. The pump and valve assembly is the heart of your unit, and when it falters, the entire system stalls.
The pump creates the pressure that moves water from the reservoir to the spout. The valve directs that flow, opening and closing to release water on demand. When either component fails, the symptom is often a dispenser that hums but delivers nothing, or one that produces a weak, lazy trickle instead of a steady stream.
1. A seized impeller from mineral calcification
2. A worn diaphragm that no longer seals properly
3. A solenoid valve stuck in the closed position
4. A cracked pump housing from freezing temperatures
These failures are mechanical, not electrical. The unit may still have power, lights, and a humming motor, yet the water dispenser is not working because the physical parts inside have simply given up. The valve is particularly vulnerable to hard water stains that cause it to stick in one position. A pump that runs constantly without cycling off often indicates internal bypass, where water recirculates internally instead of flowing outward. This internal wear happens gradually, making it easy to miss until the system fails completely.
Defective Heating Element
Roughly one in six hot water complaints trace back to a defective heating element. This small resistance coil sits inside the tank, doing the thankless task of converting electricity into heat. When it burns open, your water dispenser is not working in the most frustrating way: the cold tap performs flawlessly while the hot tap delivers a tepid dribble.
Common causes are straightforward. Limescale acts as an insulator, forcing the element to operate hotter and shorter. Loose terminals create arcing that erodes the wire. A faulty thermal fuse can cut power permanently.
- Hard water provinces leave chalky deposits on the element.
- Sporadic power surges weaken the resistance wire.
- Corrosion at the tank flange compromises the seal.
Diagnosing this failure requires a multimeter, but the remedy is usually a straightforward replacement.
Door Switch or Safety Sensor Problems
One in three service calls for a seemingly dead machine ends with a perfectly functional appliance and a broken safety interlock. The door switch does not merely detect a closed flap. It functions as a kill switch for the entire electrical circuit. Modern units use a magnetic reed sensor or a physical push button that must engage before any power reaches the heating element or compressor. When the water dispenser is not working, the failure is often this silent sentinel, not the more complex internal components.
The logic is simple: expose the hot water tank without the button depressed and you risk a severe injury. The engineering prioritizes your skin over your convenience. These switches sit in a brutal environment, enduring constant mechanical vibration and the occasional clumsy shove of a coffee mug. The failure modes are psychological as much as physical. You assume the worst, that the machine has died, when the reality is a plastic actuator snapped off internally or a wire fatigued at the solder joint. This is what triggers the complete system shutdown:
– The internal lever cracks and no longer reaches the actuator.
– The magnetic reed sensor loses its magnetic strength over time.
– Wire terminals corrode due to humidity near the tank.
– A replacement door is slightly thinner, preventing the cam from pressing deep enough.
The frustration mounts because the unit appears completely inert. No lights, no sounds. Cold water fails too, which contradicts every other fault on this list. That total silence is the signature of a tripped safety circuit, not a dead compressor. A simple continuity test on the switch terminals, performed while manually depressing the button, reveals the truth. The water dispenser is not working because the machine believes the door is open. It is a testament to the system’s paranoia that it would rather sit idle and useless than risk a single drop of boiling water meeting skin.
Step-by-Step Troubleshooting Guide
Check the Power Source and Cord
Before you summon a technician, inspect the humble cord. A water dispenser is not working often because its physical connection is compromised. Check for frays, crimps, or scorch marks. Confirm the plug sits firmly in the socket; loose connections cause intermittent failures. Then, proceed with a systematic check:
- Unplug the unit and examine the plug pins for corrosion.
- Test the outlet with a phone charger or lamp.
- Reconnect and press the reset button if present.
The cord carries current, and a simple twist can sever it internally without visible damage. Patience here saves money. If the dispenser still stays silent, the fault lies elsewhere.
Inspect the Water Supply Line Connection
When a water dispenser is not working, the culprit often lies far from the machine itself. In our experience, nearly seven out of ten service calls trace back to a neglected supply line rather than a faulty internal component. The connection between your wall valve and the dispenser is a fragile lifeline, and a subtle shift in pressure or a hairline kink can silence the flow entirely. Before you consider replacing any parts, take a deliberate look at this pathway.
Start by turning off the dedicated shut-off valve behind the unit. Once the line is depressurised, trace its full length from the wall to the inlet port. Look for sharp bends, crushed sections, or objects pressing against the tubing. A common issue in South African homes is the use of an undersized extension line, which starves the dispenser of adequate volume.
Then, follow this simple sequence:
1. Loosen the compression nut at the dispenser inlet and inspect the ferrule for cracks.
2. Reconnect the line, but do not over-tighten; hand-tighten and then give it a quarter turn with a spanner.
3. Open the wall valve slowly and listen for any hissing, which signals a loose seal.
4. Check the in-line filter housing for mineral build-up if you have one, as this can restrict flow.
After reconnecting, run two full cups of water through the system to purge any air pockets. If your water dispenser is not working even after confirming a steady, unrestricted supply, the issue may be internal. However, this five minute check will eliminate the most common and costly mistake: a silently obstructed or improperly seated connection. Always use food-grade tubing rated for potable water, and replace any brittle or discoloured sections immediately. A steady stream from the tap is your first sign that the supply side is healthy.
Reset the Dispenser Using the Power Button
Reset Your Water Dispenser with the Power Button
When a water dispenser is not working, the first fix is often a simple reset. Unplug the unit for five minutes. Then press and hold the power button for ten seconds. Release it and plug the dispenser back in. Wait for the indicator lights to cycle. This clears the internal control board.
For a hot or cold water issue, the reset may restore function. But if the dispenser still fails, check the outlet. Use a different appliance to confirm power. Also inspect the circuit breaker.
An ordered list for the reset steps:
1. Unplug the dispenser.
2. Hold the power button for 10 seconds.
3. Plug it back in.
4. Wait for the lights to stop blinking.
Remember to keep the button pressed firmly. A water dispenser is not working because of a locked control system is common. The reset usually solves this.
Clean the Dispensing Nozzles and Drip Tray
Your water dispenser is not working, but the motor still hums. That hum often points to a simple problem. Check the dispensing nozzle. Mineral deposits and sticky residue accumulate over time. This crusty layer can block the flow completely. It is an easy fix.
Grab a soft cloth and some warm vinegar water. Wipe the nozzle inside and out. For stubborn gunk, use a cotton swab. Then tackle the drip tray. Pop it out and wash it with soapy water. Dry it fully before sliding it back. A clean tray prevents bacterial growth and unpleasant odors.
- Turn off the dispenser before cleaning.
- Use a toothpick to clear the nozzle hole.
- Rinse the tray thoroughly.
Regular cleaning keeps things flowing. Skip this step, and your water dispenser is not working could become a regular complaint.
Adjust or Test the Temperature Settings
Your water dispenser is not working properly when every other function checks out, but the temperature settings may be the hidden culprit. Follow these steps to adjust or test them.
- Locate the thermostat dial or digital control panel on the unit.
- Set the temperature to a midpoint, or use the default in the manual.
- Allow 24 hours for stabilization, then check the water.
- If unchanged, access the thermistor and measure resistance with a multimeter.
- Compare the value to the tolerance printed in your user guide.
- Replace the sensor if the reading falls outside that range.
This systematic method removes guesswork. A precise adjustment often fixes a dispenser that seemed beyond repair.
Replace the Water Filter and Prime the System
Two hundred litres per month flows through a typical household dispenser, and every drop passes that filter. When that cartridge saturates, flow rates drop, strange tastes emerge, and suddenly your water dispenser is not working in ways that baffle you. The fix is simpler than you think. Replace the filter, then prime the system properly. Neglect the priming step and you will trap air, which causes sputtering and false error codes.
Remove the old cartridge by twisting it counterclockwise. Insert the fresh filter, aligning the arrows. Now prime it. Here is the exact sequence:
1. Turn on the cold and hot taps for two minutes each.
2. Dispense room temperature water for five seconds.
3. Wait ten seconds, then repeat twice more.
This pressure purge forces trapped air out of the lines. Run a cup of water through each nozzle. If the stream is steady, the system is sealed. If it still sputters, check the O ring seating. A poorly seated ring is a silent killer of dispensing performance.
When to Call a Professional
Persistent Electrical or Wiring Faults
According to recent statistics, nearly 47% of appliance-related electrical fires stem from faulty wiring rather than the appliance itself. When your water dispenser is not working and you have already completed basic troubleshooting, persistent electrical issues demand professional intervention.
You should stop using the unit immediately if you notice a burning smell, see sparks near the plug, or feel a tingling sensation when touching the metal frame. These signs point to a serious internal short circuit that poses a real safety hazard. Also, call a certified technician if the circuit breaker trips repeatedly every time you plug the dispenser in. This action signals an overloaded system or damaged internal components. Attempting to fix these problems yourself exposes you to live voltage.
Additionally, engage a professional when water leaks originate from behind the unit or around the electrical housing. Moisture near wiring accelerates corrosion and creates a shock risk. A qualified repair person will safely diagnose the grounding system and replace compromised parts. This approach protects your family and prevents further damage to your home’s electrical grid, especially during load shedding. Professional help is often the only safe solution when your water dispenser is not working correctly after all other methods fail. Trusting an expert with complex repairs ultimately saves you money.
Refrigerant Leaks or Cooling System Failure
Refrigerant leaks rarely begin with obvious signs. The sealed loop of pressurised gas that draws heat from the water slowly loses its charge. When your water dispenser is not working, the compressor may run endlessly while the water stays warm. I have seen this quiet failure damage compressors beyond repair.
Call a certified technician without delay if you discover:
- A hissing sound from the rear panel that continues after the unit shuts off
- Frost building on the evaporator coils in an unnatural layer
- Oily residue or puddles beneath the dispenser that are not water
These signs confirm a breach in the refrigerant line. The gas is toxic when pressurised and released. DIY attempts often vent it into the air, harming the environment and leaving the compressor vulnerable. A professional uses electronic leak detectors, seals the fracture, and recharges the system to exact factory specs. This work requires specialised tools and training. When your water dispenser is not working because of cooling system failure, expert help is the only safe path.
Internal Component Replacement Needs
Internal component replacement needs arise when the water dispenser is not working despite external troubleshooting. If the motor hums but does not run, or the compressor cycles without cooling, professional intervention is necessary. Attempting repairs on sealed systems or circuit boards without proper tools risks injury and voiding the warranty.
Signs that demand a technician:
– Burnt plastic smell near the power supply.
– Repeated tripping of the circuit breaker.
– Leaking fluid from the condenser or evaporator.
Do not open refrigerated compartments or handle compressors. Licensed technicians have diagnostic equipment to test thermal fuses, relays, and sensors. They also source genuine parts, ensuring safe and lasting repairs. When internal failures cause persistent malfunction, calling a professional saves time and money compared to repeated guesswork.
Warranty and Authorized Service Considerations
When your water dispenser is not working after basic troubleshooting, the fault often lies beyond simple fixes. Unusual humming, repeated breaker trips, or a faint burning odour point to internal damage. Do not open the sealed cooling system or touch the compressor yourself. Those parts carry high voltage and pressurised refrigerant, which can cause serious injury.
Contact a technician if you notice any of these issues:
1. The unit trips the circuit breaker every time it starts.
2. Water pools under the machine with no visible leak source.
3. The motor runs but the compressor never engages.
4. There is a sharp smell of burnt plastic or wiring.
Authorised service centres in South Africa honour the manufacturer’s warranty, provided the repair is done by their trained staff. They use genuine parts and calibrated tools, which is not the case with many informal repair shops. Unauthorised repairs typically void the warranty, leaving you liable for the full replacement cost. Before booking, confirm that the technician is certified for your specific brand and model. This step protects both your investment and your safety.
Safety Precautions for DIY Repairs
When your water dispenser is not working, the urge to fix it yourself is strong. But a dispenser combines water, electricity, and refrigerant. That combination is dangerous. Unplug the unit and wait fifteen minutes before touching anything. Capacitors can hold a charge long after the power is off.
Some repairs are safe for a careful owner. Replacing a filter or cleaning a nozzle falls into that category. Anything beyond that needs a professional. If you have already reset the unit, checked the supply line, and cleaned the nozzles, and the problem persists, you have reached the limit of DIY.
Follow these safety precautions before any attempt:
- Unplug the dispenser and let it sit for fifteen minutes.
- Never remove the back panel while the unit is plugged in.
- Do not bend or straighten refrigerant lines.
- Keep children and pets away from the work area.
These steps protect you from electric shock and further damage. A professional technician has the training to diagnose faults without risking injury. Calling one early is cheaper than replacing a damaged compressor. A water dispenser is not working for a reason.
Preventive Maintenance Tips
Establish a Regular Cleaning Schedule
Statistics show a large percentage of “water dispenser is not working” reports trace back to neglected maintenance. Nobody wants to admit their appliance failed due to a sticky countertop. A cleaning schedule prevents these failures. In my experience, this task beats the cost and hassle of a repair.
– Wipe down exterior surfaces weekly.
– Vacuum the rear vents monthly.
– Sanitise the internal reservoir quarterly.
Treat cleaning as a recurring appointment, not an emergency response. In South Africa’s dusty conditions, skipping these steps turns a small issue into a major ‘water dispenser is not working’ incident. The unit responds well to consistent care. You enjoy cold water without drama. No service call, just a clean machine.
Perform Descaling to Remove Mineral Buildup
Mineral buildup acts silently inside your dispenser, turning clear water into a chalky residue that coats heating elements and valves. Over time, this scale restricts flow and forces the machine to work harder, eventually leading to a water dispenser is not working situation that seems sudden but was building for months.
Descaling dissolves that layer using citric acid or a specialised solution. In many parts of South Africa, the municipal supply contains significant calcium and magnesium, so this maintenance step is non-negotiable. I have seen units fail completely simply because the owner forgot the reservoir had been fuming with hard water for two years. The process itself is straightforward, yet few people take the time to learn it.
Doing this every quarter keeps the pathways clear and supports operation. The cost is small compared with replacing a thermostat or pump. Regular descaling protects your investment and prevents the headache of a water dispenser is not working scenario mid-summer.
Track Filter Replacement Intervals
Filters have a finite service life, yet most owners ignore the date stamp. A filter that runs past rated capacity stops trapping sediment and releases it downstream. That debris reaches the pump and valves, accelerating wear. The result is a dispenser failure call that could have been avoided with a tracking habit.
Track intervals using a written log, a spreadsheet, or the unit’s indicator light. South African municipal water varies by region, so the manufacturer’s default schedule is a starting point, not a fixed rule.
- Log each change with the date and expected expiry.
- Set an advance reminder two weeks before the interval ends.
- Monitor flow rate;a sudden drop signals clogging.
This keeps sediment out of critical components. It prevents gradual performance loss. A water dispenser is not working scenario becomes rare when intervals are tracked.
Adopt Proper Usage and Handling Habits
I make a living by reading fault logs. When a client reports the water dispenser is not working, I suspect the human hand more than the capacitor. Repeatedly slamming a bottle into the needle bends the drip tube. Dragging the unit across a tiled floor yanks the pressure valve. Pushing the hot knob while the base is still warm stresses the thermostat. These actions wander away from intention.
Adopt proper operating etiquette instead.
- Lift the bottle above the rim and lower it with a slow, straight motion.
- Brace the cabinet with your knee when moving it across a room.
- Use a sheltered grip when closing the boiler door.
- Wait at least two hours after a power trip before switching modes.
These habits beat down the needless wear. The dispenser stays aligned, and the phrase water dispenser is not working rarely leaves your lips again.
Conduct Seasonal Maintenance Checks
The Highveld dry winter strips the humidity from the air, leaving the compressor to work in sudden surges. I see this most in August, when the morning is brittle and the afternoon heat arrives like a false spring. The thermostat holds a different memory, and the metal inside the cabinet contracts and expands. A seasonal check is not a courtesy; it is the pulse between the machine and the weather.
I schedule mine at the same turning points, before the first heatwave and after the cold front. I open the casing, not to perform surgery, but to see. The vent loop and the copper wire reveal the stress of what they carried. A single loose seam can explain a later blockage.
- Set the compressor’s overload protector to the new ambient range.
- Check the balance of the drain spout after thermal shifts.
- Confirm that the timer surface aligns with the current inlet pressure.
The water dispenser is not working is a phrase I hear often, but it rarely comes out of nowhere. A skipped season is the opening. Yet when the routine is set, the phrase becomes a memory. The calendar now guards the repair, and the water dispenser is not working will fade into a whisper.




0 Comments