
Understanding Water Dispenser Taps
Overview of Water Dispenser Taps
Water dispenser taps are often overlooked but are crucial for ensuring safe and hygienic water access. These small but vital components control water flow and prevent contamination, making their proper functioning essential. In South Africa, where water quality standards are increasingly stringent, understanding the different types of water dispenser taps can help you make informed decisions about water dispenser tap replacement.
Most water dispenser taps fall into two broad categories: manual and automatic. Manual taps require a simple turn or press, while automatic taps use sensors to dispense water, reducing contact and promoting hygiene. Knowing which type suits your needs can streamline the replacement process and extend the lifespan of your water dispenser.
- Durability
- Ease of installation
- Compatibility with existing systems
Investing in quality water dispenser taps and understanding their mechanics ensures your water delivery remains safe and efficient. Whether you’re replacing a worn-out tap or upgrading to a more hygienic model, paying attention to these details is vital for a seamless water dispenser tap replacement experience.
Common Types of Water Dispenser Taps
Understanding the various types of water dispenser taps is essential for anyone considering water dispenser tap replacement. In South Africa, where water quality is increasingly scrutinized, choosing the right tap can make a significant difference in hygiene and functionality. Manual taps, which require a simple turn or press, are traditionally more common and straightforward to replace. They rely on mechanical parts that, over time, may wear out or become clogged, necessitating a careful inspection during the replacement process.
On the other hand, automatic water dispenser taps offer a touchless experience that aligns with modern hygienic standards. These sensors activate water flow with minimal contact, reducing the risk of contamination. When contemplating water dispenser tap replacement, understanding the core differences between these types can help you select a model that best suits your environment. Here’s a quick overview of common types:
- Manual Taps – Dependable and easy to install, perfect for basic needs.
- Automatic Taps – Sensor-activated for enhanced hygiene and convenience.
Choosing between manual and automatic water dispenser taps depends on factors like durability, ease of installation, and system compatibility. Recognizing these distinctions ensures that your water dispenser operates efficiently and safely, especially in settings where water quality standards are paramount. Whether upgrading or replacing, understanding the mechanics behind water dispenser taps is crucial for a seamless water dispenser tap replacement process that guarantees long-term performance.
Signs That Indicate the Need for Replacement
Sometimes, the signs that your water dispenser tap needs replacement are subtle, yet they carry significant implications for hygiene and efficiency. A lingering dripping sound or inconsistent water flow might seem minor, but these are often early indicators of internal wear or corrosion. In South Africa, where water quality concerns are increasingly prominent, neglecting these signals could compromise health standards and disrupt daily routines.
Persistent leaks are more than just an annoyance—they can lead to mold growth and damage to your dispenser over time. Additionally, if you notice strange tastes or odors in the water, it could mean bacteria or mineral buildup within the tap components, signaling that a water dispenser tap replacement is overdue.
- Unusual noises or slow water flow
- Leaks or dripping from the tap
- Unpleasant taste or smell in the water
- Visible corrosion or mineral deposits
Recognizing these warning signs early can save you from costly repairs and ensure your water remains safe and clean. In the complex world of water dispenser maintenance, understanding when to opt for a water dispenser tap replacement is crucial—it’s the first step toward safeguarding health and maintaining optimal functionality.
Tools and Materials Needed for Tap Replacement
Essential Tools
When it comes to water dispenser tap replacement, having the right tools and materials on hand can make all the difference between a smooth repair and a frustrating ordeal. Think of it as the difference between a chef with a sharp knife and one trying to carve a roast with a spoon—quality tools make the job effortless.
First, you’ll need a trusty set of screwdrivers—both flathead and Phillips—to loosen and tighten those pesky screws holding the tap in place. A pair of pliers will help grip and manipulate parts that refuse to budge, especially if the tap has been stubbornly rusted in position. Don’t forget a wrench or adjustable spanner; it’s indispensable when dealing with fittings that require a bit of muscle.
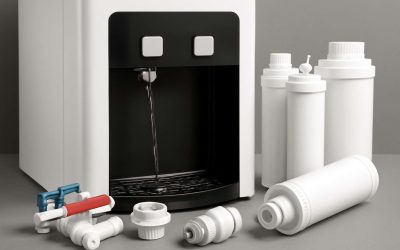
As for materials, you’ll want a new water dispenser tap that fits your specific model, along with some Teflon tape to ensure a watertight seal. A clean cloth or rag is perfect for wiping down components and avoiding any leftover grime messing up your work.
- New water dispenser tap
- Teflon tape
- Screwdrivers (flathead and Phillips)
- Pliers
- Adjustable wrench
- Cleaning cloth
Additional Materials
Embarking on a water dispenser tap replacement journey demands more than just intuition; it requires a deliberate assembly of tools and materials that transform a daunting task into a manageable one. The right equipment acts as a catalyst, turning what could be a frustrating ordeal into a seamless process, especially when precision and durability are at stake. In the quiet hum of your workspace, the significance of quality tools becomes evident—each component, from screwdrivers to wrenches, plays a pivotal role in ensuring your replacement is both effective and long-lasting.
For water dispenser tap replacement, a reliable set of screwdrivers—both flathead and Phillips—is essential to navigate the intricate web of screws securing the tap. Pliers come into play when stubborn fittings refuse to yield, offering the grip needed to free or adjust corroded parts. An adjustable wrench is indispensable, providing the leverage necessary to tighten or loosen fittings without damaging delicate components. Alongside these tools, having a fresh water dispenser tap that fits your model, combined with Teflon tape, guarantees a watertight seal that prevents leaks and prolongs the life of your installation.
Additional materials such as a clean cloth or rag are invaluable for wiping down surfaces, removing grime, and inspecting parts during the process. This attention to cleanliness not only ensures a professional finish but also minimizes potential issues down the line. When preparing for water dispenser tap replacement, consider the following essentials:
- New water dispenser tap
- Teflon tape
- Screwdrivers (flathead and Phillips)
- Pliers
- Adjustable wrench
- Cleaning cloth
Equipped with these materials, the repair transforms from an intimidating task into a precise operation—one that restores the flow and function of your water dispenser with confidence and efficiency. Every element, meticulously chosen, speaks to the importance of quality and attention to detail in water dispenser tap replacement—key to safeguarding your hydration needs in any South African household or office.
Step-by-Step Guide to Replacing a Water Dispenser Tap
Preparing the Workspace
Preparing your workspace is a crucial first step in water dispenser tap replacement. A clean, organized area minimizes mess and keeps tools within reach. Clear the surrounding space of any clutter and lay down a soft cloth or towel to catch drips. Ensuring proper lighting allows for better visibility, reducing the risk of mistakes.
Next, gather all necessary tools and materials. Having everything ready saves time and prevents interruptions during the replacement process. To streamline the task, consider creating a checklist:
- Screwdriver
- Wrench
- Replacement water dispenser tap
- Cloth or rag
- Bucket or basin
This preparation phase might seem simple, but it lays the foundation for a smooth and efficient water dispenser tap replacement. Proper setup can make the difference between a quick fix and a frustrating ordeal, especially when dealing with stubborn fittings or unexpected leaks. Take the time to prepare thoroughly — it’s worth it!
Turning Off Water Supply
Turning off the water supply is an essential step in the water dispenser tap replacement process—neglecting this can lead to a flood of frustration, or worse, water damage. Before you start, locate the main water valve connected to your dispenser. It’s surprising how often a simple shut-off is overlooked, yet it’s the difference between a smooth operation and a messy ordeal.
Once the water supply is securely turned off, open the existing tap to release any residual pressure and drain remaining water. This prevents accidental spillage during removal. For added reassurance, have a bucket or basin on hand to catch any drips that might escape during the transition. Carefully loosen the fittings with your wrench or screwdriver, depending on the type of tap you’re replacing. Remember, patience and precision are your best allies in water dispenser tap replacement—rushing can damage fittings or cause leaks that are tricky to fix later on.
By meticulously executing this initial step, you lay the groundwork for a seamless replacement process, ensuring your water dispenser continues to serve fresh, clean water without interruption. The importance of shutting off the water supply cannot be overstated; it’s the cornerstone of a successful water dispenser tap replacement that’s both efficient and leak-free.
Draining Remaining Water
When it comes to water dispenser tap replacement, draining the remaining water might seem like a minor detail, yet it’s a critical step that can determine the success of your entire project. Leaving water in the lines can lead to unexpected spills and complicate the removal process, causing unnecessary frustration. To avoid this, open the tap after shutting off the water supply, allowing gravity to do its work. This simple act releases residual pressure and drains the water, transforming what could be a messy ordeal into a smooth operation.
For added assurance, keep a basin or bucket nearby—trust me, the last thing you want is water cascading onto your floor when you least expect it. If you’re working with a more complex water dispenser, consider following a step-by-step approach:
- Loosen fittings carefully with your wrench or screwdriver.
- Allow any remaining water to flow out into your basin.
- Check for hidden pockets of water that might linger in the pipes or fittings.
This meticulous attention to draining during water dispenser tap replacement underscores the importance of patience and precision. It’s not just about removing a tap; it’s about respecting the delicate balance of water systems and ensuring your dispenser continues to serve fresh, clean water without leaks or interruption. A small oversight here can ripple into bigger problems—so, take your time and drain thoroughly. The integrity of your water dispenser relies on it.
Removing the Old Tap
Removing the old water dispenser tap is a delicate dance—an act of relinquishing the familiar for the promise of renewed clarity. As you prepare to embark on this essential step, ensure your workspace is quiet, free of distractions, and well-lit. The first move involves carefully loosening the fittings that secure the tap, a process that demands both patience and the right tools. A wrench or screwdriver, depending on your dispenser’s design, will be your allies in this endeavor. As you begin to unscrew, anticipate the gentle cascade of residual water—an inevitable reminder of the dispenser’s inner workings.
Once the fittings are loosened, gently extract the old tap, taking care not to damage the surrounding components. It’s a moment of transition; the old tap, often worn or corroded, gives way to something more reliable. To facilitate this process, a step-by-step approach can be invaluable:
- Loosen fittings carefully, avoiding undue force that might crack or deform the fittings.
- Remove the tap slowly, supporting it as it comes free to prevent unnecessary stress on the pipes.
- Inspect the surrounding area for any residual water or debris that could interfere with the new installation.
This meticulous removal process underscores the importance of patience and precision—two virtues that turn a seemingly mundane task into a testament of craftsmanship. When you approach water dispenser tap replacement with respect for the system’s delicate balance, the result is a seamless transition that preserves the integrity of your dispenser and ensures it continues to serve fresh, clean water without leaks or interruptions.
Inspecting and Cleaning the Area
Inspecting and cleaning the area before installing a new water dispenser tap is crucial for ensuring a leak-free connection. Once the old tap has been removed, take a moment to examine the surrounding components. Dirt, debris, or residual water can compromise the seal of the new tap, leading to leaks or blockages. Carefully wipe down the area with a clean cloth, removing any grime or buildup that may have accumulated. This step might seem simple, but it’s vital for maintaining the integrity of your water dispenser’s system.
Next, check the condition of the fittings and the pipework. If you notice corrosion, cracks, or damage, consider replacing these parts as well. For a seamless water dispenser tap replacement, a thorough inspection prevents future issues. When the area is clean and dry, you’re ready to move on to fitting the new tap, confident that it will fit perfectly and function reliably for months to come.
To streamline your process, you can follow this step:
- Ensure the area is free of debris and residual water.
- Inspect fittings and pipework for damage.
- Clean the surface with a cloth, removing any buildup.
- Dry the area thoroughly to prepare for the new tap.
Installing the New Tap
Replacing a water dispenser tap is more than just a task—it’s an act of renewal, a renewal of the very flow that sustains us. Once the old tap is removed, the stage is set for the new to take its rightful place, promising years of seamless service. Before installation, it’s vital to ensure the surrounding area is pristine; dirt and residual water are silent saboteurs that threaten the integrity of your water dispenser tap replacement. A thorough wipe with a clean cloth clears the path for a secure, leak-free connection.
Next, inspect the fittings and pipework with a discerning eye. Look for signs of corrosion or cracks—these minor imperfections can become major headaches down the line. If damage is evident, replacing these parts now will save time and trouble later. To streamline the process, consider the following steps:
- Ensure the workspace is free of debris and residual water.
- Check fittings and pipework for damage or corrosion.
- Clean the surface meticulously, removing any buildup or grime.
- Dry the area thoroughly, preparing a pristine canvas for the new tap.
With the surface prepared, fitting the new water dispenser tap becomes a delicate dance—each turn and tighten ensuring the perfect seal. When executed with care, this step transforms a simple replacement into a testament to precision, promising a flow that is both reliable and enduring. The artistry of water dispenser tap replacement lies in respecting the small details—the gentle wipe, the careful inspection—that culminate in a connection that sings with reliability for months to come. After all, a well-installed tap is more than a mere fixture; it’s the lifeblood of hydration, the silent guardian of purity in every drop.
Sealing and Securing the New Tap
Replacing a water dispenser tap is a delicate ballet of precision and patience. The sealing process is crucial, for it transforms a simple installation into a fortress of reliability. As you tighten the fittings, each turn should be deliberate, ensuring that the connection is snug without over-tightening, which could damage delicate components. This step guarantees a watertight seal, preventing leaks that can silently undermine the entire system.
Once the new tap is in place, securing it becomes the final act of the installation performance. Use a wrench or spanner to gently tighten the fittings, ensuring they are firm but not strained. For added security, consider applying a thread sealant or plumber’s tape around the fittings—these small details can make all the difference in maintaining long-term integrity. If your water dispenser tap replacement involves multiple connections, a quick checklist can streamline the process:
- Ensure all fittings are clean and free from debris.
- Check that the gasket or O-ring is properly seated for an effective seal.
- Gradually tighten each connection to evenly distribute pressure.
- Inspect for any signs of movement or leaks after securing.
The artistry lies in the finesse—each adjustment, each twist, is an act of trust in the craftsmanship of your work. When done correctly, your water dispenser will sing a pure, uninterrupted flow, a testament to the meticulous care invested in every step of the water dispenser tap replacement process. Here, precision isn’t just a virtue; it’s the promise of hydration that sustains us day after day.
Restoring Water Supply and Testing
Once the new tap is securely in place, the next step is to restore the water supply and test the system thoroughly. This ensures your water dispenser functions flawlessly and prevents future leaks. Start by turning the water supply back on slowly, watching for any signs of leaks or drips around the fittings. It’s essential to be patient—rushing this step can lead to tightening fittings too much, risking damage to the new tap or fittings.
After turning the water back on, let the water flow for a few minutes to flush out any debris that might have entered during the water dispenser tap replacement process. Check around all connections for leaks or moisture. If you notice any drips, tighten the fittings slightly—never over-tighten! This careful approach guarantees a tight seal and a reliable water flow. Once satisfied, run the dispenser through a few cycles. A smooth, uninterrupted flow confirms the success of your water dispenser tap replacement and restores your hydration source with confidence.
Tips for Ensuring a Successful Replacement
Choosing the Right Replacement Tap
Choosing the right replacement tap for water dispenser tap replacement can feel like navigating a labyrinth of options. The key lies in understanding the subtle nuances—material, size, and compatibility—that determine whether your new tap will seamlessly integrate into your existing system. A poorly chosen tap not only risks leaks but can also compromise the purity of your water supply, an unforgivable lapse in a setting where health and hygiene reign supreme.
To ensure a successful water dispenser tap replacement, consider these critical factors:
- Material durability—opt for corrosion-resistant metals like stainless steel or high-grade plastics.
- Size compatibility—measure your current tap precisely to prevent fitting issues.
- Ease of installation—select a design that simplifies the replacement process, especially if you’re doing it yourself.
Investing time in these details transforms a mundane task into a reliable upgrade, ensuring your water dispenser functions flawlessly for years to come.
Proper Use of Teflon Tape
In the delicate ballet of water dispenser maintenance, the proper use of Teflon tape becomes a silent conductor, orchestrating a seamless water dispenser tap replacement. The adhesive’s role extends beyond mere sealing; it embodies the meticulous craftsmanship required to prevent leaks and ensure hygiene standards are uncompromised. When applied correctly, Teflon tape acts as a resilient barrier, accommodating minor irregularities in threading and creating an impermeable seal that withstands the rigors of daily use.
To achieve optimal results, wind the Teflon tape in a clockwise direction around the tap’s threaded end, ensuring it overlaps evenly without excessive buildup. A thin, even layer suffices—overapplication can lead to difficulties during installation or interfere with proper tightening. For those embarking on their water dispenser tap replacement journey, remember that patience and precision here are vital. A well-sealed tap not only guarantees leak-free operation but also preserves the purity of your water supply, a paramount concern in any health-conscious environment.
In essence, mastering the art of proper Teflon tape use transforms a routine task into a safeguard of hygiene and functionality, elevating your water dispenser’s performance and longevity.
Checking for Leaks
In the shadows of routine maintenance lurks a silent threat—an unnoticed leak can gradually erode the integrity of your water dispenser, turning a simple water dispenser tap replacement into a battle against unseen decay. Ensuring a successful replacement demands vigilance, especially when checking for leaks. It’s a step often overlooked, yet it’s the very moment where chaos can be unleashed if neglected.
Once the new tap is installed and secured, turn on the water supply slowly. Observe the connection point—a tiny drip or a faint trickle signals that something has gone awry. Pay close attention to the threading and sealing area; even a minuscule leak can compromise hygiene and efficiency. For peace of mind, consider performing a gentle pressure test by running water through the tap for a few moments, watching for any persistent seepage.
To further safeguard your efforts, you might find this simple checklist invaluable:
- Inspect the seal and Teflon tape for proper application
- Ensure the tap is tightened securely but not overtightened
- Monitor the connection for at least 10 minutes to catch slow leaks
Patience is your ally here—rushing can undo all your meticulous preparation. In the darkened corners of your workspace, a well-executed water dispenser tap replacement becomes a testament to your craftsmanship, sealing out leaks and preserving the purity of every drop—a true guardian of hygiene in a world besieged by unseen threats.
Regular Maintenance Tips for Longevity
Ensuring the longevity of your water dispenser hinges on more than just the initial water dispenser tap replacement. It’s about cultivating an ongoing relationship with your appliance, a ritual of vigilance and care. Regular maintenance isn’t merely a chore; it’s an act of respect for the purity and efficiency of your water supply. When you routinely inspect the connection points and seals, you prevent minor issues from escalating into costly repairs. Remember, a small leak today could compromise hygiene tomorrow, making early detection a moral obligation.
To bolster your efforts, consider adopting a simple yet effective maintenance pattern. For example, after each replacement, perform a pressure test—run water through the tap for a few moments and observe closely. This habit not only confirms the integrity of your water dispenser tap replacement but also deepens your understanding of its internal mechanics. Incorporating a checklist—such as verifying the application of Teflon tape and ensuring secure tightening—can transform routine maintenance into a mindful act of preservation. In this way, you forge a silent covenant with your water dispenser: one of respect, care, and unwavering attention to detail.
Troubleshooting Common Issues During Tap Replacement
Leaks After Installation
Even the most meticulous water dispenser tap replacement can sometimes end in a leak, transforming your pristine countertop into a mini swimming pool. It’s enough to make anyone question their DIY skills—who knew that turning a simple tap into a source of chaos could be so easy?
Leaks after installation are often the result of overlooked details like improperly tightened fittings or insufficient sealing. Sometimes, even a tiny misstep, such as not applying enough Teflon tape or not checking the alignment, can turn your water dispenser into a drip factory. To avoid this watery dilemma, double-check your sealing techniques and ensure all connections are snug but not overly tight, which can damage threads.
If you’re troubleshooting a leak post-installation, consider inspecting the following:
- Check if the Teflon tape was applied evenly and enough layers were used.
- Ensure all fittings are securely tightened without forcing them into submission.
- Re-examine the area for any debris or damage that could be compromising the seal.
Sometimes, a simple re-tightening or a fresh application of Teflon tape is all that’s needed to seal the deal in your water dispenser tap replacement adventure.
Water Flow Problems
When facing water flow problems during a water dispenser tap replacement, the frustration can be almost poetic. After all, the ideal water flow isn’t just about convenience; it’s about ensuring your daily routines remain uninterrupted. Often, these issues stem from small oversights or missteps that seem insignificant but have a surprisingly dramatic impact on water delivery.
One common culprit is air trapped within the system. This pesky intruder can cause inconsistent flow or even complete blockage, making it seem as if your water dispenser has developed a personality of stubbornness. To remedy this, gently re-prime the tap, ensuring all connections are tight and free of air pockets. Sometimes, a simple re-tightening of fittings or a quick flush can work wonders.
If water flow remains elusive, consider inspecting the internal valve mechanism for blockages or debris. You might find that sediment buildup obstructs the flow, especially in regions where water quality varies. To prevent future headaches, always ensure your water dispenser tap replacement process includes a thorough cleaning of the area, removing any mineral deposits or debris that could hinder water flow. Remember, the devil is in the details, and a meticulous approach often makes the difference between a successful water dispenser tap replacement and a soggy disaster.
Difficulty Removing or Installing the Tap
Encountering difficulty removing or installing the water dispenser tap during a water dispenser tap replacement can be a perplexing ordeal. The process, seemingly straightforward, often devolves into a frustrating dance of stubborn fittings and delicate components. It’s as if the tap itself resists surrender, embodying the silent stubbornness of an uncooperative partner. The key to navigating this challenge lies in understanding the intricacies of the tap’s design and the subtle forces that hold it in place.
In many cases, corrosion or mineral deposits act as silent saboteurs, binding the tap tightly to the dispenser body. Applying gentle but firm pressure, combined with proper tools, can often coax the stubborn component free. Sometimes, a strategic use of penetrating oil or a careful twist with adjustable pliers can loosen the connection without causing damage. Remember, patience is paramount—rushing the process risks damaging delicate parts or misaligning the new water dispenser tap.
To streamline the installation, consider the following:
- Ensure all threads are clean and free of debris before attempting to screw in the new tap.
- Utilize Teflon tape or appropriate sealants to facilitate smoother fitting and secure sealing.
- Check the compatibility of the replacement tap with your specific water dispenser model, avoiding unnecessary fuss and setbacks.
By approaching the task with a meticulous attitude and a keen eye for detail, the water dispenser tap replacement transforms from a dreaded chore into a satisfying achievement—leaving you with a reliable, leak-free water system that functions seamlessly. Because sometimes, the hardest part isn’t the replacement itself; it’s overcoming the little hurdles that make or break the process.
Professional Assistance and When to Call a Technician
Signs You Need Expert Help
When tackling water dispenser tap replacement, recognizing the limits of DIY efforts is crucial. Sometimes, what seems like a straightforward task can hide underlying issues that only a professional can address effectively. Water dispensers are intricate systems, and improper replacement can lead to persistent leaks or compromised water quality. That’s where professional assistance becomes invaluable. Skilled technicians bring a wealth of experience, ensuring the tap is replaced correctly without damaging the delicate internal components of your dispenser.
Significant signs indicate when to call a technician, such as persistent leaks, inconsistent water flow, or difficulty in removing or installing the tap. Ignoring these symptoms can escalate problems, resulting in costly repairs or even health hazards due to contamination. A seasoned expert can diagnose and resolve these issues swiftly, providing peace of mind that your water dispenser functions safely and efficiently. Remember, while water dispenser tap replacement might seem straightforward, entrusting a professional guarantees longevity and optimal performance of your device.
Benefits of Hiring a Professional
In the intricate dance of maintaining a pristine water dispenser, the role of professional assistance in water dispenser tap replacement cannot be overstated. While the task may appear deceptively simple, beneath the surface lies a labyrinth of delicate components that demand a meticulous touch and seasoned expertise. A misstep during water dispenser tap replacement can compromise the entire system, leading to leaks, contamination, or damage that could have been avoided with a skilled hand.
When the symptoms are unmistakable—persistent leaks, uneven water flow, or difficulty in fitting the new tap—calling a technician becomes not just advisable but essential. The benefits extend beyond immediate fixes; expert intervention ensures that your water dispenser functions optimally, safeguarding your health and prolonging the device’s lifespan. Remember, the precision required for water dispenser tap replacement is often underestimated, and entrusting this task to professionals guarantees a seamless, lasting result.
How to Find Reliable Plumbing Services
When it comes to water dispenser tap replacement, enlisting professional assistance can mean the difference between a seamless fix and a costly mistake. While the task might seem straightforward, the intricate nature of water dispenser components demands a seasoned touch. A skilled technician doesn’t just replace the tap—they ensure that the entire system remains water-tight and contamination-free. This level of precision is crucial, especially when dealing with health-critical water systems in South Africa’s diverse environments.
Recognizing when to call a technician is equally important. Persistent leaks, inconsistent water flow, or difficulty fitting the new tap are telltale signs that expert help is needed.
- Leaks after installation
- Water flow problems
- Difficulty removing or installing the tap
These issues can compromise your water quality and appliance longevity. Reliable plumbing services for water dispenser tap replacement are accessible if you know where to look—search for licensed professionals with reputable reviews and years of experience in water system maintenance. Ensuring your water dispenser functions flawlessly isn’t just about convenience; it’s about safeguarding your health and investing in the longevity of your appliance.”

0 Comments